You are a data engineer. You are designing a Hadoop Distributed File System (HDFS) architecture. You plan to use Microsoft Azure Data Lake as a data storage repository.
You must provision the repository with a resilient data schema. You need to ensure the resiliency of the Azure Data Lake Storage. What should you use? To answer, select the appropriate options in the answer area.
NOTE: Each correct selection is worth one point.
Hot Area:
Answer is in the explanation below.
Reference / correct answer:
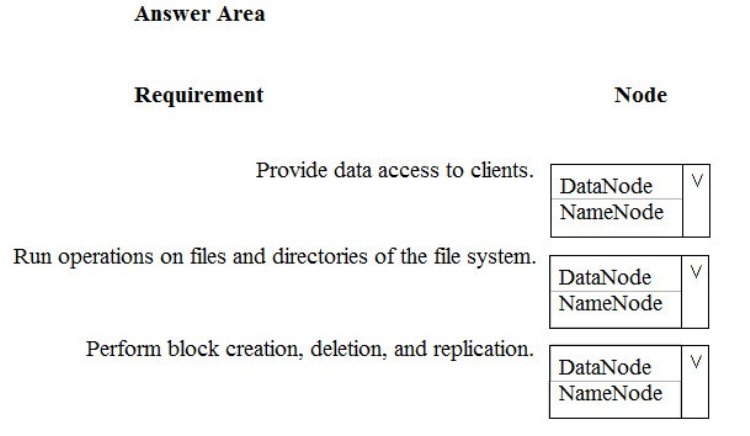
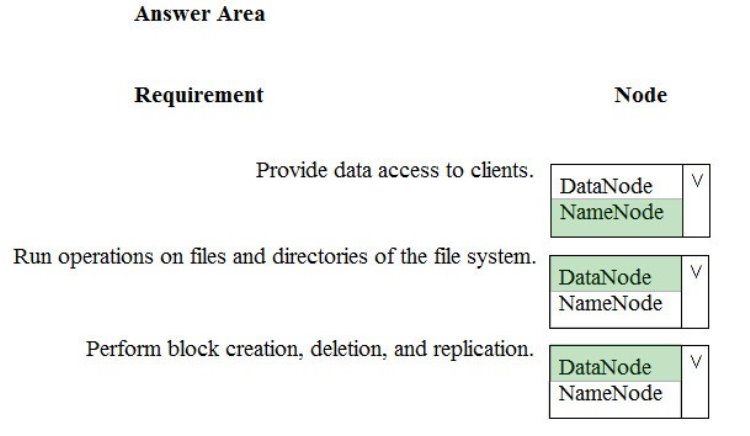
Box 1: NameNode
An HDFS cluster consists of a single NameNode, a master server that manages the file system namespace and regulates access to files by clients.
Box 2: DataNode
The DataNodes are responsible for serving read and write requests from the file system’s clients.
Box 3: DataNode
The DataNodes perform block creation, deletion, and replication upon instruction from the NameNode.
Note: HDFS has a master/slave architecture. An HDFS cluster consists of a single NameNode, a master server that manages the file system namespace and regulates access to files by clients. In addition, there are a number of DataNodes, usually one per node in the cluster, which manage storage attached to the nodes that they run on. HDFS exposes a file system namespace and allows user data to be stored in files. Internally, a file is split into one or more blocks and these blocks are stored in a set of DataNodes. The NameNode executes file system namespace operations like opening, closing, and renaming files and directories. It also determines the mapping of blocks to DataNodes. The DataNodes are responsible for serving read and write requests from the file system’s clients. The DataNodes also perform block creation, deletion, and replication upon instruction from the NameNode.
The following information is for technical support purposes only:
Lab Instance: 10543936
You need to ensure that all REST API calls to an Azure Storage account named storage10543936 use HTTPS only.
To complete this task, sign in to the Azure portal.
Answer is in the explanation below.
Reference / correct answer:
See the explanation below.
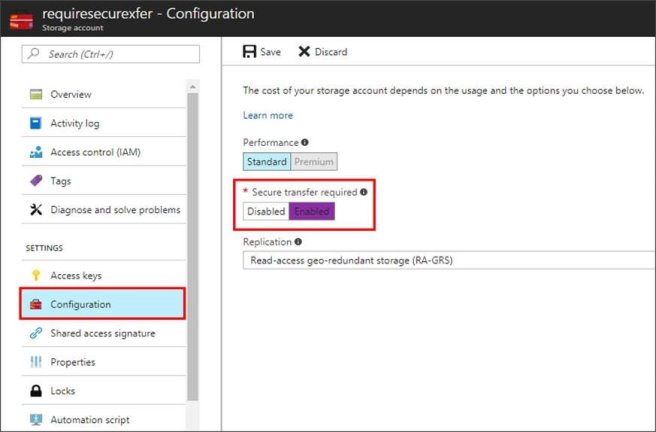
You can configure your storage account to accept requests from secure connections only by setting the Secure transfer required property for the storage account.
Require secure transfer for an existing storage account
1. Select the existing storage account storage10543936 in the Azure portal.
2. In the storage account menu pane, under SETTINGS, select Configuration.
3. Under Secure transfer required, select Enabled.
The following information is for technical support purposes only:
Lab Instance: 10543936
You need to create an elastic pool that contains an Azure SQL database named db2 and a new SQL database named db3.
To complete this task, sign in to the Azure portal.
Answer is in the explanation below.
Reference / correct answer:
See the explanation below.
Step 1: Create a new SQL database named db3
1. Select SQL in the left-hand menu of the Azure portal. If SQL is not in the list, select All services, then type SQL in the search box.
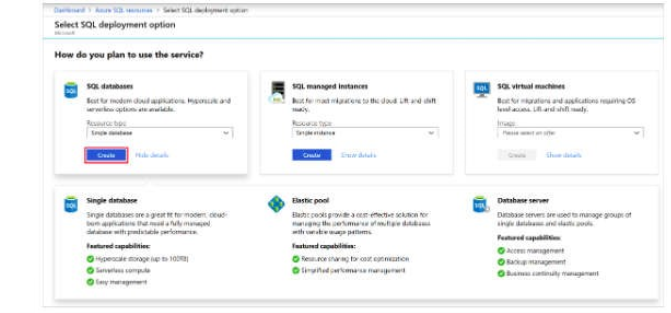
2. Select + Add to open the Select SQL deployment option page. Select Single Database. You can view additional information about the different databases by selecting Show details on the Databases tile.
3. Select Create:
4. Enter the required fields if necessary.
5. Leave the rest of the values as default and select Review + Create at the bottom of the form.
6. Review the final settings and select Create. Use Db3 as database name.
On the SQL Database form, select Create to deploy and provision the resource group, server, and database.
Step 2: Create your elastic pool using the Azure portal.
1. Select Azure SQL in the left-hand menu of the Azure portal. If Azure SQL is not in the list, select All services, then type Azure SQL in the search box.
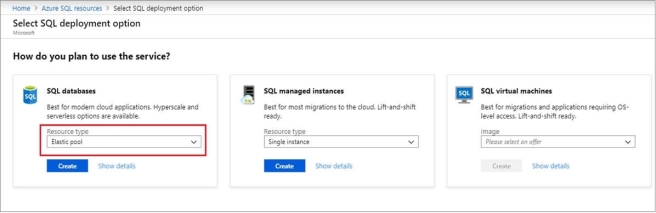
2. Select + Add to open the Select SQL deployment option page.
3. Select Elastic pool from the Resource type drop-down in the SQL Databases tile. Select Create to create your elastic pool.
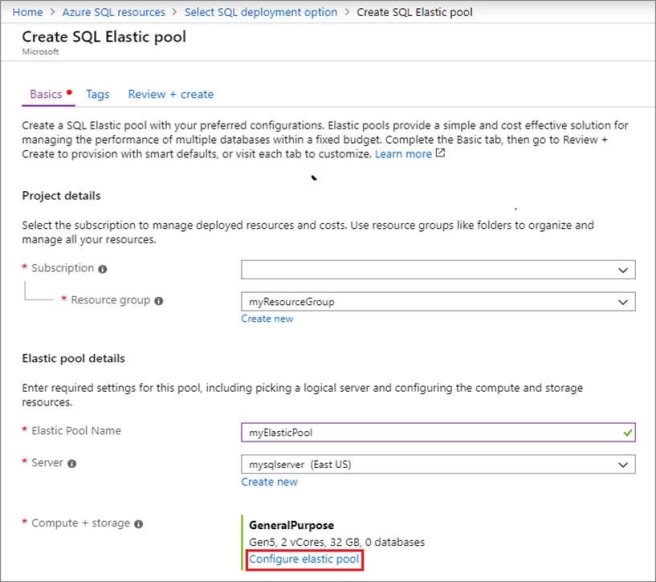
4. Configure your elastic pool with the following values:
Name: Provide a unique name for your elastic pool, such as myElasticPool.
Subscription: Select your subscription from the drop-down.
ResourceGroup: Select the resource group.
Server: Select the server
5. Select Configure elastic pool
6. On the Configure page, select the Databases tab, and then choose to Add database.
7. Add the Azure SQL database named db2, and the new SQL database named db3 that you created in Step 1.
8. Select Review + create to review your elastic pool settings and then select Create to create your elastic pool.